
A side swept fringe is a diagonal cut that falls across your forehead toward one side. It blends into your hair naturally. It does not sit straight across like blunt bangs. Most people call it side bangs or an asymmetrical fringe. Whatever you call it, it is one of the most flattering cuts a stylist can give you.
The problem is that most people get this cut without knowing what comes next. The first week feels awkward. The fringe sits wrong. They want to cut it off. But that reaction is completely normal and completely temporary. Knowing what to expect changes everything.
This guide covers everything. You will learn which face shape works best, how to survive the first 14 days, how to style it without heat, and how to maintain it at home. Whether you are thinking about getting a side swept fringe or already have one this guide gives you every answer in one place.
What Is a Side Swept Fringe?
A side swept fringe also called side bangs or an asymmetrical fringe falls diagonally across the forehead rather than straight down. You direct it to one side of your face, typically starting heavier at the temple and tapering toward the opposite eye or cheekbone. Unlike blunt bangs, a side fringe blends softly into the rest of your hair and creates a continuous, flowing line.
Side Swept Fringe vs. Curtain Bangs What Is the Real Difference?
Many clients confuse these two styles. Here is a direct comparison so you walk into your salon appointment knowing exactly what to ask for.
| Feature | Side Swept Fringe | Curtain Bangs |
| Direction | Falls to one dominant side | Parts in the middle, falls both ways |
| Shape | Diagonal, asymmetrical | Symmetrical, curtain-like |
| Face Framing | Frames one side of the face | Frames both sides equally |
| Styling Effort | Low gravity does most of the work | Moderate requires blowout or roller |
| Best For | Round, square, heart faces | Oval, long, heart faces |
| Grow Out Ease | Easy blends into layers naturally | Moderate awkward middle-part phase |
| Cowlick Friendly | Yes direction hides most cowlicks | No center part exposes them |
25 Best Side Swept Fringe Styles to Try Right Now
1. The Classic Side Swept Fringe
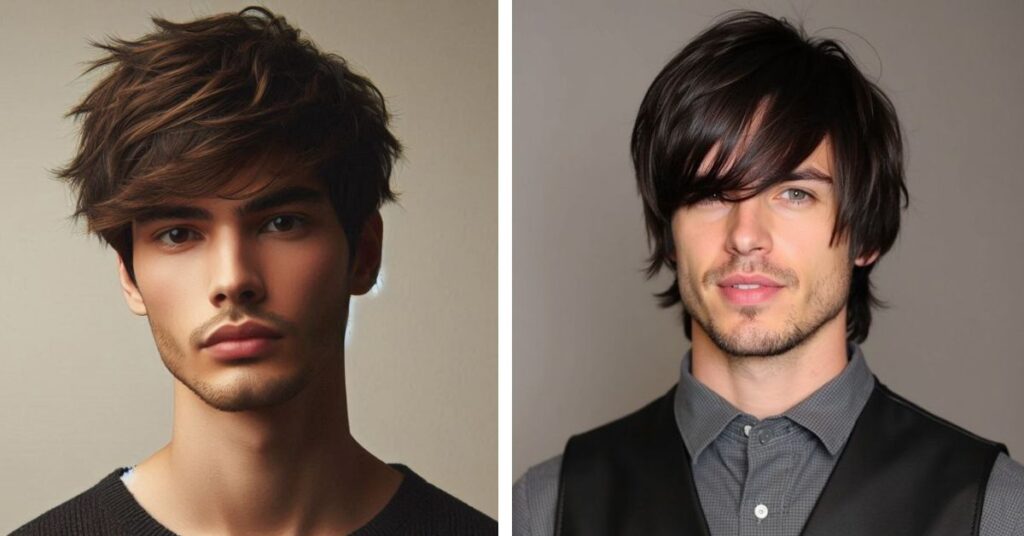
Every client who wants something timeless and fuss-free walks out with this cut. The classic side swept fringe sits at medium length, brushes naturally toward the dominant eye, and flatters almost every face shape without demanding anything dramatic from your bone structure or your morning routine. It works best on straight to slightly wavy hair, and once your hands learn the motion, it takes about four minutes to style apply a styling cream on damp hair, blow dry sideways with a round brush, and finish with a cool shot to lock the shape.
- Blends into the surrounding layers naturally as it grows, with no awkward disconnected panel.
2. The Textured Side Swept Fringe

If your fringe looks sharp in the morning and completely flat by noon, texture is the fix. Your stylist adds choppy, point-cut layers throughout the fringe section so the hair carries natural movement instead of lying dead against your forehead. Medium-length hair with fine to normal texture responds to this the best — blow dry forward first, then push sideways with your fingers while it’s still warm, finishing with a light scrunch at the ends. A pea-sized amount of matte paste through the tips keeps the separation clean without any crunch.
- Trim every 5 weeks to keep the layers sharp.
3. The Wispy Side Swept Fringe
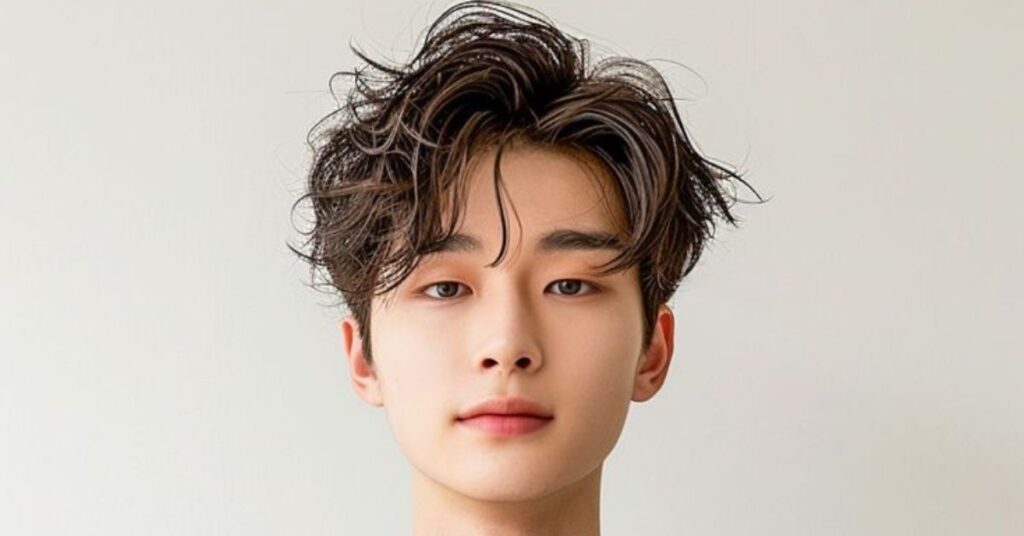
For anyone who has always wanted a fringe but kept talking themselves out of it the wispy version removes every reason to say no. Thinning shears For anyone who has always wanted a fringe but kept talking themselves out of it, the wispy version removes every reason to say no. Thinning shears lift the weight from the ends so the hair floats across the forehead rather than sitting heavy on it, giving a finish that’s soft, barely-there, and completely undramatic. It suits fine hair and heart-shaped faces particularly well, and it’s a safe starting point for anyone trying a fringe for the first time a light mousse on damp hair, air-dried halfway and then directed with your fingers, is all it needs. Just skip heavy pomades; they collapse the wispy effect almost instantly.
- Grows out the most easily of all the variations, with virtually no awkward phase.
4. The Deep Side Part Fringe
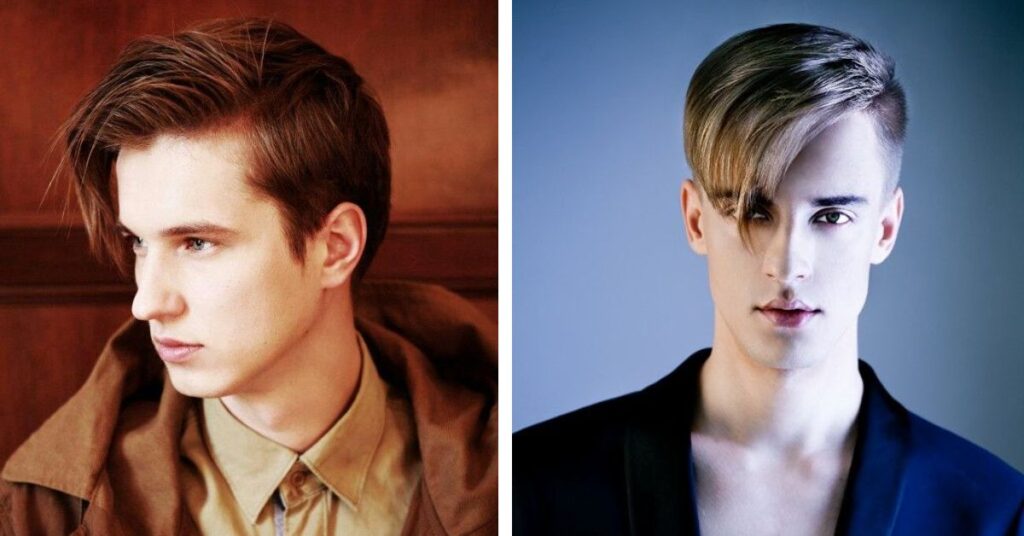
Round faces often struggle with fringes that add width instead of reducing it. A deep side part — set 3 to 4 cm further back than your natural parting — creates a sharp diagonal line across the forehead that visually lengthens the face and breaks the circular outline. It suits round and square face shapes best: set the part with a tail comb, then blow dry with a flat brush directing all the hair to the dominant side. The deeper the part, the steeper the diagonal and the more elongating the effect.
- A light-hold pomade keeps the part clean through the day.
5. The Side Swept Fringe with Undercut

The undercut removes everything below the parting line and keeps the top section long enough to sweep dramatically across the forehead. The contrast between the shaved sides and the flowing fringe makes this the dominant visual element of the whole style. It works best on straight to wavy hair for anyone comfortable with a bolder look, especially on oval and oblong faces — texture clay through the top, finger-directed sideways, with the sides kept freshly clipped.
- Sides need a touch-up every 2 to 3 weeks or the contrast starts to fade.
6. The Taper Fade with Side Swept Fringe
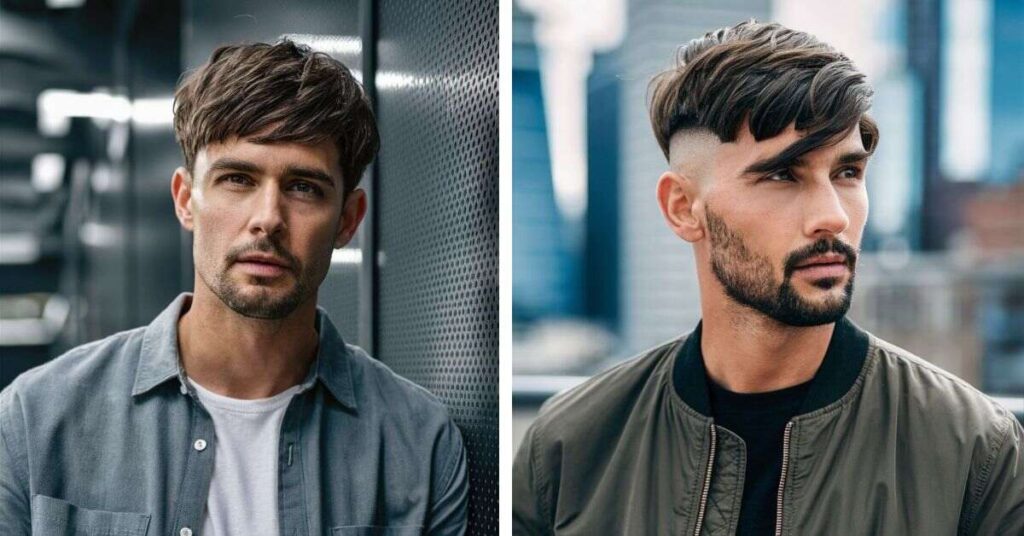
A taper fade gradually blends the sides from full length at the top down toward the ear, and pairing it with a swept fringe on top reads as polished and modern without looking extreme — the version that works in a boardroom and at a bar on the same day. It’s suited to professional settings and oval or heart-shaped faces: molding paste through the top, fringe combed to the dominant side, ends left slightly loose. Heavy wax is worth avoiding here, since it makes the fringe look stiff against a clean fade.
- The fade needs freshening every 3 weeks, the fringe every 4 to 5.
Deep part, undercut, taper fade three very different levels of boldness, but the underlying logic never changes: an angled line across the forehead reshapes proportion in a way a straight cut simply can’t.
7. The Long Side Bangs
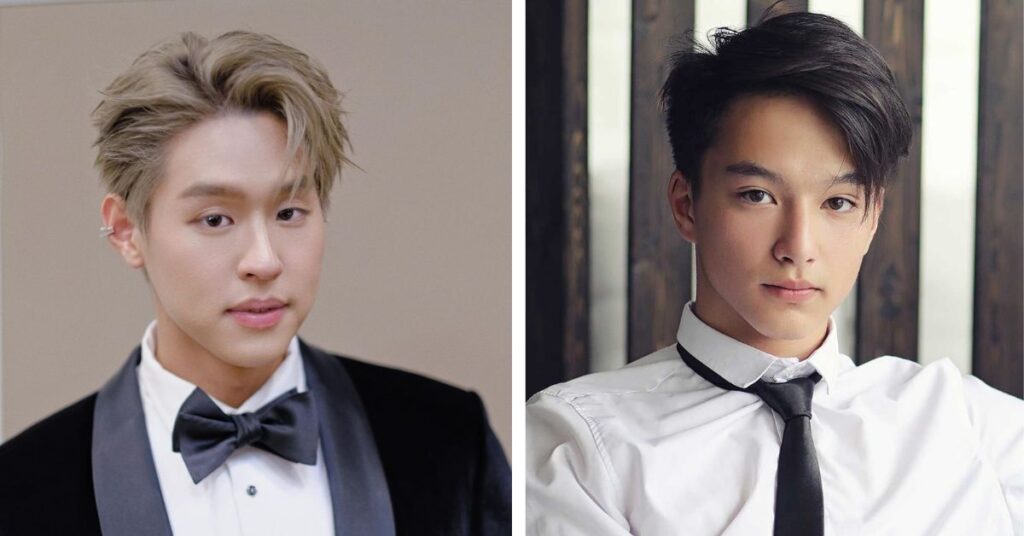
Long side bangs extend past the cheekbone and sometimes reach the jaw, creating a dramatic, face-framing sweep that adds horizontal weight at the top of the face. It’s the go-to variation for long or oblong face shapes looking to soften vertical length, and it needs medium to long hair to work. A thorough blow dry matters more here than with shorter fringes — roll a large round brush under the fringe while drying to build the curve before directing it sideways.
- A flexible-hold hairspray keeps the length in place without stiffness.
8. The Fluffy Side Swept Fringe

Hair that lies completely flat near the face benefits most from this variation, since the volume is built at the root rather than relied on from length — giving the fringe an airy, full shape that holds through the day. It suits fine or flat hair and round or square faces: volumizing mousse at the root, blown dry upward first to build lift, then redirected sideways while still warm. Skipping the upward step is the most common mistake — it’s what actually creates the volume.
- Only a lightweight volumizing mousse; anything heavier collapses the lift immediately.
9. The Side Swept Fringe for Thin Hair
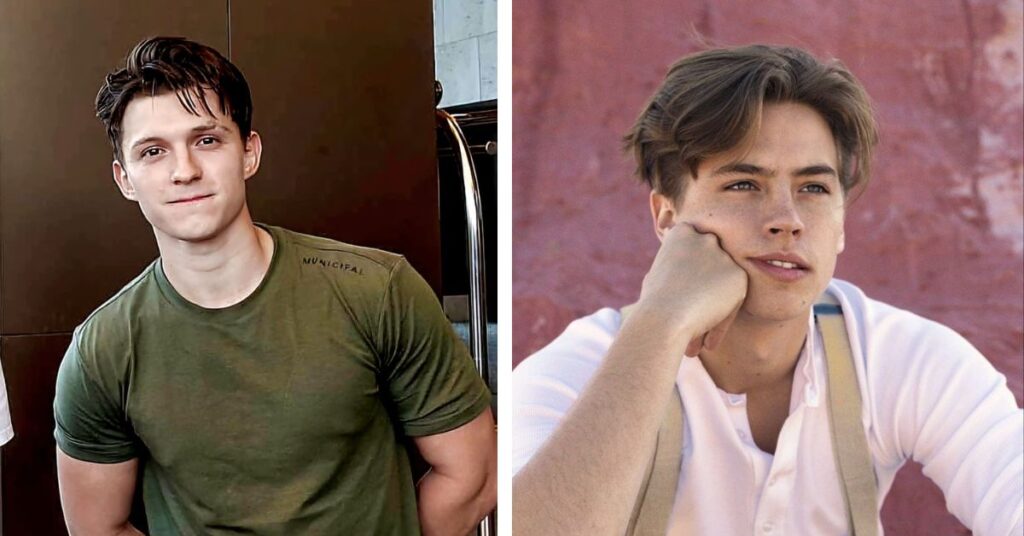
Thin hair needs a weight-reduced fringe. Your stylist point-cuts the ends rather than cutting blunt across, which removes bulk while keeping the length — and the diagonal angle creates the optical illusion of density right at the hairline, exactly where thin hair shows the most. This cut works harder for fine, thin textures than almost any other. A lightweight volumizing spray at the root before blow-drying is enough; heavy pomades, oils, or thick creams will only make thin hair look lank and greasy.
- Ask your stylist specifically for “point-cutting on the fringe ends, no blunt line.”
Of all the hair types this cut adapts to, thin hair may be the one it flatters most — the angled line does the density work that thicker cuts can’t.
10. The Side Swept Fringe with Low Fade

A low fade sits below the temple and keeps more hair on the sides than a high or skin fade would, giving a softer, more conservative result — modern enough to notice, but still appropriate in formal settings. It suits professional environments, oval faces, and anyone trying a fade for the first time: texture clay through the top, fringe combed to one side, kept light so the hair still moves naturally. What sets it apart from a taper is the line itself more defined and blended, rather than a gradual graduation.
- Low fades hold their shape longer; every 4 weeks is usually enough.
11. The Wavy Side Swept Fringe

Natural waves create movement that makes this cut look effortlessly styled even without a blow dryer — gravity and the wave pattern work together to hold the sweep direction, which means less time in front of the mirror. It’s suited to naturally wavy hair and anyone who’d rather skip heat altogether: curl-enhancing cream on damp hair, a gentle scrunch, then air-dried while directed to the right side. Brushing it dry is the one thing to avoid it creates frizz that undoes the natural movement.
- Stick to curl cream or a light-hold gel; nothing heavier.
12. The Side Swept Fringe for Curly Hair

Curly hair can absolutely carry this cut — the stylists who say otherwise are usually using the wrong technique. The stretch-cut method solves the shrinkage problem: the fringe is cut to nose length while wet, since the natural curl will pull it up to cheekbone length once it dries. Ask specifically for this — “cut it longer than you think, to account for shrinkage.” Curl mousse applied right after washing, then diffused on low heat while directing the fringe to the dominant side, keeps the shape intact. Brushing or flat-ironing it dry defeats the point entirely; the texture is what makes the cut work.
Straight, wavy, curly the cut adjusts, not the concept. Get the technique right for the texture in front of you, and the result holds up regardless.
13. The Side Swept Fringe with Curtain Effect

This hybrid style splits the fringe slightly off-center heavier on one side, with a smaller amount of hair falling to the other — delivering the soft, face-framing quality of curtain bangs while keeping the cleaner directional flow of a true side fringe. It’s a good fit for oval and heart-shaped faces, and for anyone who can’t quite commit to one style or the other. Part slightly off-center, then blow dry both sides outward and slightly downward with a round brush; the dominant side still needs to carry more weight so it reads as a side fringe rather than a center part.
- The most forgiving of all the variations to grow out it eases into curtain bangs on its own.
14. The Choppy Side Swept Fringe

Scissors cut random, uneven lengths throughout the fringe section rather than one clean line, producing a deliberately imperfect finish with texture and attitude — not a polished style, and that’s entirely the point. It suits thick hair and anyone with a bold personal style who’d rather not look too “done.” Matte clay through the fringe, fingers separating the strands to push the choppiness further, is all it needs.
- Stick to a matte finish only — shine products undercut the raw, undone look.
15. The Layered Side Swept Fringe
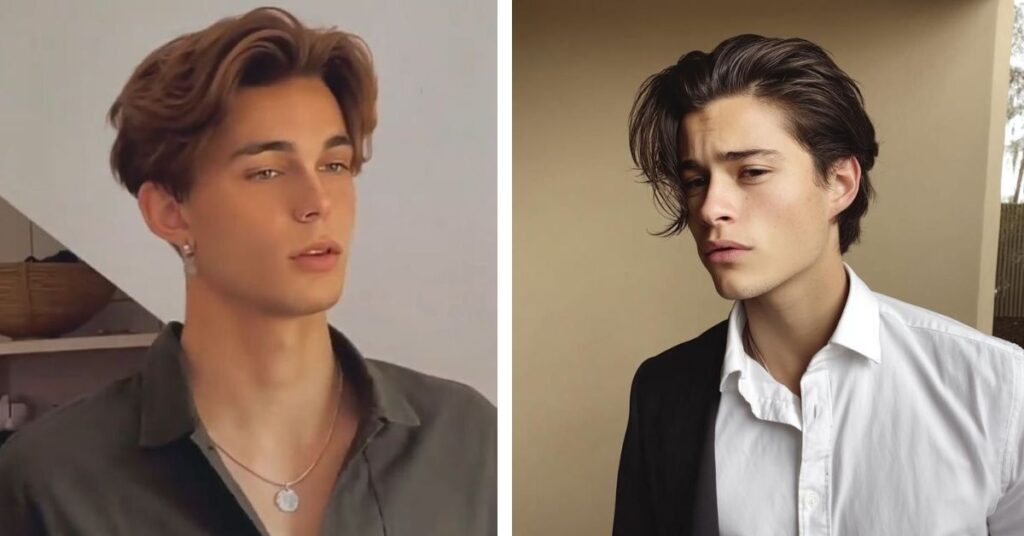
A layered fringe blends seamlessly into a full layered haircut; the fringe section continues into face-framing layers that travel down the sides of the head, so it reads as a natural extension of the cut rather than a separate added element. It works across medium to long layered haircuts and pretty much every face shape. Blow-dry the entire front section as one unit — treating the fringe separately from the face-framing layers is the mistake that breaks the effect.
- Grows out more gracefully than any other variation, since the layers absorb the length at every stage.
A layered cut is really what turns this from a standalone feature into part of the haircut itself intentional at every growth stage, not just fresh out of the chair.
16. The Side Swept Fringe for Coarse Hair

Coarse hair holds volume naturally, but without enough internal weight removed, a fringe on this texture turns into a heavy, rigid panel. The fix is a combination of thinning shears and point-cutting that reduces bulk without shortening the length. It suits coarse, thick hair — straight or slightly wavy — and needs a specific request at the salon: “thinning shears through the interior of the fringe, not just the ends.” Blow dry with a round brush using downward airflow to smooth the cuticle, finishing with a light serum for shine and frizz control.
- Air-drying coarse hair without heat direction tends to expand it and lose the sweep better to skip that step here.
17. The Side Swept Fringe for Round Faces

Round faces need a fringe that starts deep and sweeps dramatically — not one that ends at the eyebrow and adds horizontal weight. The diagonal line has to travel far enough across the forehead to visually break the circular outline. This variation is built specifically for that bone structure: set the part 3 to 4 cm deeper than your natural parting, and keep the length at cheekbone level or just below — cutting it short at the brow undoes the effect. Symmetry is the thing to avoid; asymmetry is what creates the lengthening illusion.
18. The Textured Crop with Side Swept Fringe

A textured crop pairs a short, choppy top with a front section that sweeps slightly to one side rather than falling straight down. The contrast between the cropped texture on the crown and the longer, directional fringe gives this low-maintenance style structure without much effort. It suits short hair and anyone who wants personality in a minimal cut: texture powder at the roots for lift, fingers directing the front section to the side. Anything applied after the powder just weighs the crop down.
- Trim every 3 to 4 weeks — crops lose their shape faster than longer cuts.
From a cropped top to a long, sweeping length, the same basic idea keeps producing different results depending on how much hair you’re working with.
19. The Disconnected Side Swept Fringe
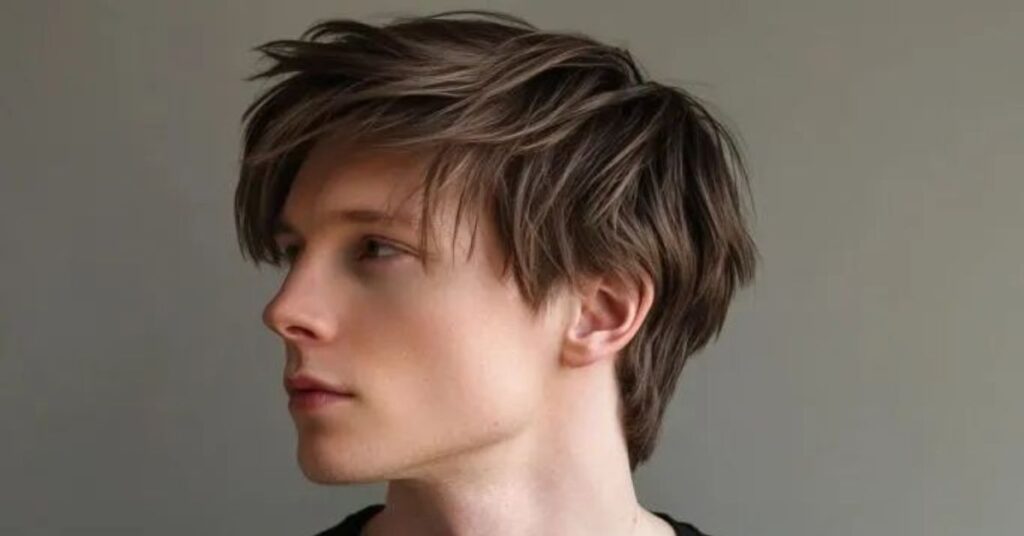
A visible, intentional gap sits between the fringe section and the faded sides — the fringe island stands alone on top, sharply separated from the clean skin fade below. This is high-fashion, editorial territory, suited to confident style choices on oval or oblong faces with skin or high fades. Matte clay through the fringe only, with the sides kept completely clean and product-free. The fade is what makes or breaks this look — a grown-out fade destroys the disconnected effect almost immediately.
- Sides every 10 to 14 days, fringe every 4 to 5 weeks.
20. The Side Swept Fringe for Square Faces

Square faces carry strong, angular jawlines that a soft fringe immediately balances. Thinning shears on the ends keep the fringe feather-light, so it falls with a soft finish rather than adding more hard lines to an already angular bone structure. This variation is built specifically to soften that geometry — kept at or just past the brow, long enough to draw the eye upward and inward. Blunt cutting is the one thing to avoid here; thinning shears on the ends only.
- Blow dry downward and sideways at the same time — never forward, which creates a heavy panel.
21. The No Heat Side Swept Fringe

You can train a side swept fringe into its direction without touching a single hot tool. The pin curl method uses your hair’s own drying process to set You can train this fringe into its direction without touching a single hot tool. The pin curl method uses your hair’s own drying process to set the shape, giving a naturally rounded, swooped result with zero heat damage. It suits heat-damaged hair, fine hair prone to breakage, and anyone cutting back on tool use: a light-hold mousse on a damp fringe, rolled into one large pin curl toward the sweep side, clipped in place for 20 to 30 minutes. Release it last after makeup or getting dressed for a soft, voluminous swoop that holds without any product crunch.
No heat, no tools just timing and technique. It’s proof that a well-trained fringe doesn’t actually need a hot tool to hold its shape.
22. The Celebrity Inspired Side Swept Fringe

Celebrity versions of this cut look different from a standard side fringe because of one specific blow-dry technique: wrapping a large round brush under the fringe section and rotating it outward while drying downward, building a glossy, curved sweep rather than a flat one. A lightweight cream at the ends adds shine and control — nothing at the root. If the sweep droops, one pass of a flat iron on the mid-length is enough; the root should never see heat.
- The curl rotates outward, away from the face that outward direction is what creates the polished swoop, not an inward curl.
23. The Humidity Resistant Side Swept Fringe

Humidity forces the hair shaft to absorb moisture and swell, collapsing the styled shape from the inside out — fighting it takes a three-layer approach built into the styling process, not a single product applied at the end. An anti-humidity serum from mid-length to tip goes on before blow-drying, followed by a cool shot immediately after shaping to close the cuticle and lock the shape. A flexible-hold hairspray, held about 30 cm from the fringe, finishes it off once styling is done.
24. The Grow Out Side Swept Fringe

Growing out a fringe doesn’t have to mean two months of clips and frustration — each growth stage has its own styling approach that keeps it looking intentional rather than abandoned. At nose length, twist the fringe back loosely and pin it at the temple with a spiral pin (never a straight clip, which breaks the trained sweep direction). At lip length, work it into a loose braid at the front hairline. By chin length, ask your stylist to add long side bangs that merge the fringe into face-framing layers, with no visible blunt disconnection.
- The one rule throughout: never pin it straight back keep the lateral direction even during grow-out.
25. The Low Maintenance Side Swept Fringe

This is the version for anyone with five minutes and zero patience for complicated styling. A naturally deeper side part lets gravity do the directional work, so the fringe drops into place after a single comb pass and needs nothing more. It suits busy mornings and straight to slightly wavy hair kept just at the brow, long enough that gravity holds the direction without any real styling. A small amount of lightweight pomade, pressed between the palms and smoothed across the fringe, only comes into play if flyaways show up.
The Cowlick Compatibility Methodology
Before you book an appointment, it’s worth understanding one critical thing: your natural hair growth pattern determines how your side fringe behaves every single day. Here is a simple 3-step at-home diagnostic that can help you avoid a bad cut — many barbers use a version of this before picking up the scissors.
Step 1: The Wet Comb Test
Wet your hair completely, comb it straight back off your face, and leave it alone for 60 seconds. Watch where the hair naturally wants to fall. The direction your hair defaults to is your dominant growth pattern and that is the side your fringe should sweep toward.
Step 2: The Whorl Check
Run two fingers along your hairline from the center out toward each temple. Feel for any resistance, springiness, or changes in direction. A whorl or cowlick in the fringe zone means your stylist needs to use a point-cut technique and cut the fringe longer and never blunt so the hair can sit naturally rather than fight gravity all day.
Step 3: The Air Dry Drop Test
After the wet comb test, allow your hair to air dry without touching the fringe area. Where it settles on its own is your natural “rest position.” If it drops toward your left eye, your side fringe should sweep left. Fighting this direction every morning adds 10 minutes to your routine and accelerates frizz.
Pro Tip: Screenshot your wet comb test results and show your stylist. A photo of your natural growth pattern communicates more than any verbal description ever will.
Which Face Shape Works Best with a Side Swept Fringe?
Many outdated rules claim certain face shapes should avoid bangs entirely but what actually matters is how the cut is customized for your proportions. Here’s a face-shape-by-face-shape breakdown.
| Face Shape | Does It Work? | Best Approach | What to Avoid |
| Round | Excellent | Deep side part; fringe sweeps past the brow to break the circular outline | Short fringe ending at mid-forehead — it widens the face |
| Square | Excellent | Soft, wispy fringe that softens the angular jawline | Blunt, heavy fringe that adds more horizontal weight |
| Heart | Great | Medium-length fringe from a high side part to balance a wider forehead | Very deep side part that emphasizes forehead width |
| Oval | Versatile | Any variation works — experiment with starting point and length | Nothing to actively avoid |
| Long / Oblong | Good with tweaks | Keep fringe slightly fuller and wider to add visual width at the top | Overly narrow fringe that makes the face appear even longer |
| Diamond | Works | Sweep fringe toward the narrower temple to balance proportions | Fringe that ends too short above the brow |
Not sure which category your face falls into? Use our free face shape analyzer tool to get an instant, photo-based result before picking a variation from the table below.
The Texture Transformation Three Real Client Case Studies
One of the biggest myths about side swept fringes is that they only work on straight, manageable hair. Here’s how the right technique adapts across different textures.
Case Study A: Fine, Limp Hair
Case example: someone with fine, limp hair who had previously tried heavy curtain bangs that weighed the hair completely flat. Switching to a tapered, weight-reduced side swept fringe cutting point-to-point rather than blunt let the fine strands hold lift naturally, creating the illusion of volume without any product.
Case Study B: Coarse, Curly Hair
Curly hair shrinks significantly when it dries, so the “stretch-cut” method works best: cutting the fringe while wet to nose-tip length. Once dry, natural curl shrinkage pulls it up to the ideal resting point at the cheekbone. Cutting at the intended dry length often leaves curly hair far too short after the first wash.
Case Study C: Fine Hair with a Cowlick
For fine hair with a cowlick at the temple exactly where the fringe needs to start, the best approach is to work with it rather than against it — directing the fringe with the cowlick’s natural push, adding extra length on that side, and point-cutting the ends to remove bulk. This lets the cowlick provide natural lift at the root instead of an awkward bump.
What to Expect in the First Two Weeks
Most people go through a short adjustment period after getting a side swept fringe. It can feel unfamiliar or heavy on the face in the first few days, but that reaction is completely normal and temporary. Understanding this timeline in advance makes it much easier to stick with it.
The first few days can feel the most awkward — the fringe sits differently than what you’re used to, and it’s common to want to push it out of your eyes constantly. By around the first week, styling starts feeling quicker and more natural. Most people report feeling fully comfortable with the fringe by the two-week mark, once both their hands and their hair adjust to the new direction.
Why does the adjustment period happen?
Two things drive this adjustment period. First, your hands have muscle memor. You have spent years pushing your hair away from your face, and now you need to redirect it. Second, your hair has its own memory it has been lying flat or in a different direction for months or years, and it takes consistent styling repetition to train it into a new position.
Advice: commit to at least two weeks before making any judgment. Most people who push through the adjustment period end up genuinely happy with the result.
How to Style Your Side Swept Fringe Three Professional Techniques
Technique 1: The Blowout Method
Blow dry the fringe section first, before the rest of your hair. Direct the airflow from root to tip, using a round brush to sweep the hair in the desired direction. Lock the style with a cool shot from your dryer. Finishing with cool air closes the cuticle and extends hold by up to four hours.
Technique 2: The Pin Curl Set
Apply a light-hold mousse to the fringe while damp. Roll the entire fringe section into a single pin curl in the sweep direction and secure it with a clip. Style the rest of your hair, apply your makeup, and release the curl last. This technique delivers a voluminous, swooped shape with zero heat damage.
Technique 3: The Windy Day Lockdown
Place one bobby pin horizontally at the root of the fringe on the lighter side. Cross a second bobby pin over it at a 45-degree angle. This criss-cross method anchors the fringe without flattening the volume at the crown, a technique most people never learn until their fringe ends up across their face on a breezy day.
The 4 Week Maintenance Schedule
Most clients wait too long between trims and then cut too much off in a panic. Follow this timeline to stay ahead of the grow-out instead of reacting to it.
| Week | Phase | What to Do |
| Week 1 | The Training Phase | Style the fringe in the same direction every single morning. Use a light pomade or serum to reinforce the sweep direction. Do not let it air dry in a random position. |
| Week 2 | The Growth Check | Hold a ruler to the fringe. If it touches your eyelashes, you need a trim within the next 7 days. If it rests above or at the brow, you have time. |
| Week 3 | The Transition Styling | If the fringe enters the “eye-poking zone,” twist it back loosely and secure with a single pin at the temple. Never clip it straight back — this breaks the trained sweep direction. |
| Week 4 | The Touch-Up Decision | Measure again. A fringe 1 cm past the brow is a salon visit. A fringe 3–4 mm past the brow is a micro-trim you can safely do at home using the dry-cut method below. |
The Dry Cut Home Trim Method
Dry cutting — trimming the fringe while it’s completely dry rather than wet — has become a preferred method among stylists because hair often falls differently once it dries, especially with bangs that need precise, face-framing shape. Cutting wet risks misjudging the final fall of the fringe once it settles.
Side Swept Fringe for Specific Hair Concerns
Side Swept Fringe for Humid Climates
Humidity is the number one enemy of a freshly styled fringe. Apply a pea-sized amount of anti-humidity serum from mid-length to tip before you style. Set the blow dry with a cool shot and finish with a flexible-hold hairspray held 30 cm from the fringe. Avoid touching the fringe after styling the heat from your fingertips activates frizz.
Growing Out Your Side Swept Fringe Gracefully
The awkward stage begins when the fringe passes the nose. At this point, use a side braid or twist to incorporate the fringe into the body of your hair. Ask your stylist to add long layers to the front section that merges the fringe into the rest of the haircut seamlessly rather than leaving a blunt disconnected panel.
Conclusion
A side swept fringe is one of the most flattering, low-maintenance, and adaptable haircuts you can choose but only when you understand the three variables that actually determine its success: your natural growth pattern, your face shape proportions, and your commitment to the 14 day adjustment period.
The people who love their side swept fringe are not the ones with the “easiest” hair. They are the ones who showed up with knowledge, communicated clearly with their stylist, and pushed through the first two weeks. Most people who stick with it past the two-week mark end up genuinely happy with the result.
Start with the wet comb test tonight. Book your appointment with the face-shape table in hand. Follow the 4-week maintenance schedule. Your fringe will not just look good on Day 1 it will look better every single week that follows.
Frequently Asked Questions
Once your hair learns the direction usually after 10–14 days a side swept fringe takes 2 to 5 minutes to style. Most clients find it is actually faster than their previous style because the fringe naturally falls with gravity rather than against it.
You can trim an existing side swept fringe at home using the dry-cut method described in the maintenance section. However, I strongly recommend seeing a professional for the initial cut. The starting point, angle, and sectioning are the most critical decisions and getting them wrong at the beginning makes everything harder to fix.
Most clients need a fringe trim every 4 to 6 weeks. If you have fast-growing hair, plan for every 3 to 4 weeks. Many salons offer a free or low cost fringe trim between appointments.
A side swept fringe reduces the visual surface area of the forehead by covering part of it diagonally. For most face shapes, it makes the forehead appear smaller and the eyes appear larger. The deeper the side part, the more dramatic the coverage.
Yes it works exceptionally well with glasses. The diagonal line of the fringe creates visual interest that complements the horizontal line of the frame rather than competing with it. Ask your stylist to keep the fringe length at or just below the top of your frame for the most balanced result.
Every hair texture can work with a side swept fringe when the stylist adapts the technique correctly. Straight hair holds the sweep naturally. Wavy hair adds soft movement. Curly hair needs the stretch-cut method. Coarse hair benefits from thinning shears to reduce bulk. There is no texture that makes this cut impossible, only inexperienced stylists who apply the same technique to every client.
Use a fabric headband placed at the hairline not on top of the head. This holds the fringe back without creating a crease. If you prefer no headband, twist the fringe section back and secure it with a single spiral pin. Avoid elastic bands directly on the fringe section, as they leave a dent that is difficult to style out.

Ryan Cole writes about men’s grooming, covering barbering techniques, current trends, and how styles adapt across different hair types and face shapes. He focuses on practical, wearable advice: how to describe a cut to your barber and how to maintain it day to day.